wood back

Showing posts with label buttons. Show all posts

Monday, August 24, 2020

Oh My God We're Back Again (with a Terrarium Lamp)

This post is me picking up from where I left off in my last post. I'm surprised I'm actually doing this. If you don't recognize the title, that's the first verse in "Everybody (Backstreet's Back)" by the Backstreet Boys. 

In my last post I was bragging about how great my vintage thrift store lamp makeovers are. I mean, I think they're cool because I designed them myself. You might not agree. 

I came up with idea to make a terrarium lamp a while back. Not sure where I came up with it; I think that I wanted plants in a jar and I just happened to have a glass lamp. I Googled my plan and found only one example of a fake terrarium lamp in a blog post. Great, my idea was slightly original! Wait, what's a terrarium you ask?

These are. There's something very "70s-nature-boho" about these plants growing in jars. The 1970s was a time when crafting and indoor plants were popular and terrariums were both of those things.

Here is my ultra obvious "how to" on my terrarium lamp! See this:

The humble glass jar lamp. Often seen filled with shells, sometimes hexagon shaped. Notice this is an actual old ginger jar lamp, not a Mason jar! Look in your thrift store lamp aisle.

I like to start with one of those. If empty, cool; if not, de-shell. See that round metal base? It unscrews from the bottom for a jar entrance! I gather up some artificial plants and other things. 

These "other things" might be found in a thrift, but you might have to hit up a crafts store.

There's my work station and supplies. Let's break it down and use pictures:

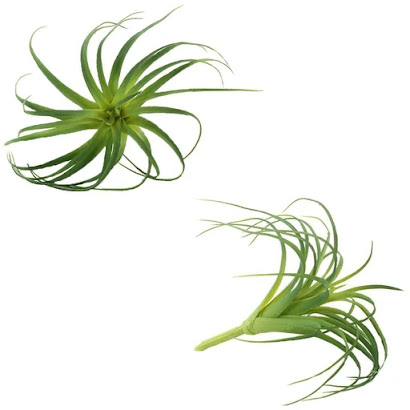
Artificial air plants
 Artificial succulents
Moss chunks
Moss!
Driftwood
Aquarium pebbles

I pick out some of those things. Then I put the things in the lamp. You following? Need further directions? 

But seriously...this is not a difficult project. Add a lampshade for an additional challenge. Here are some of my results!
 

This one is my favorite because of that cool shape.
I also really like that one with the mid century mod lampshade.
 
I tend to stage them next to owls.

Are they not kind of cute?! 

I have also filled a few glass jar lamps with other things!

Buttons and other sewing supplies!

Tiny vintage toys! I thought that one was so much fun but it collected dust for about two years before it sold! The buyer's review stated that she loved it and also called it "fun," so I'm glad someone appreciated it.

I made this Christmas themed lamp...about three seasons ago. Still for sale! 

Here's the before and after!


Thrift store lamp upcycle!


Sunday, April 2, 2017

'Cuz you're hot and you're cold

It seems like just a couple weeks ago, the kids were shedding their coats at recess and I was putting both my Uggs and faux Uggs in the closet. Yea, spring time!
Not so fast. Suddenly the temps dropped...the spring coat went back on the hanger as I retrieved my furry boots. Before I knew it, it was April Fool's day and I was clearing several inches of heavy wet snow off my car. New England winter came right back like some unfunny internet troll whom you thought was banished.
So I guess I had the chance to do another winter refashion or two. I quickly took a "before" pic of this mohair sweater. I know I did. Seriously, how the frick do I keep mysteriously losing my "before" pictures! This one's an easy fix:
I took an "after" shot and edited it back to its original state! It was a plain black sweater dress with a high neck. It was a Goodwill half-off item and made of soft, fuzzy... mohair? Fake mohair?
That's how much I cut off the hem. Just a little, knowing it would curl up. Hoping it would. It was actually a wide hem, like a cuff. I removed the same little cuff-like piece from the neck. I did it with scissors and it was so easy I just kept cutting!
That right there was a bad idea. I felt the pockets didn't look right as they were in the front thigh region. You can't just slice off pockets and move on. I sewed that thing right back on.
It needed some "jazzing" up...finally, an opportunity to browse my extensive button collection!
I chose three round, white dealies with little sparkles in the center. Anyway, here it is with some jeggings.
You know how I took this picture? I moved my bedroom mirror (which just leans against the wall, unattached) into the kitchen with that white curtain I use for a backdrop. My room is too messy for mirror selfies.


Friday, April 8, 2016

False alarm on the springtime; it got all cold and snowy again

Do you know what happened last week? It freaking snowed. I do hate to discuss the weather so frequently but it is quite relevant to this thing I do. With the outfits and the sewing and such.
A few posts back, I was talking about a blue dress that I wanted to wear, but could not because the temps were around 60.
Oh god, even the photo editing couldn't save my face here. No makeup=bad
See that dress up there? I got it at one of the last 50% sales at Savers and it's made out of some (artificial?) woolly material. But don't you like the lumberjack plaid? Here's what's wrong:
Those damn sleeves. Why do I keep encountering them? Stop gathering the sleeve holes, you jerks; I don't want poof sleeves ever. Also, the pockets stick out and there are large belt loops with no belt.
Behold: I messed around with the sleeves and added a shiny vinyl belt with matching shoes. 
Look! It's above the knee! By the way, I did nothing with the pockets because they're fine once belt is added to the equation.
Oh, I did this new thing where instead of taking 100 pics and being picky, I just took a few. So, I'm not as happy.
I got mad blue dresses! This post is a two-for! Two dresses in this post. A short post...and this one's a no-sew.
Look at all that thick blue fabric. So warm...every part of me is covered in soft coziness. I can't wear that though.
That's what I took off with a brand new pair of fabric scissors while sitting at my parents' house. That's all? Let's see what it looks like.
I did it! It's a wearable dress, using only scissors. I trimmed additional material off the neckline, btw. Then the obvious: the ol' belt sash made from the trimmed off length.
But, wait! There's a third thing! It's a goddamn three-for! That necklace! It's a button necklace...
I did not make the button necklace. Ring the shame bell.
First, I got that at Hobby Lobby. I am a feminist, and I don't like their anti-birth control stance. My uncle got me a gift card for Christmas and was like, "use at your own risk, it's a bad company!" Deals before beliefs, we say. Look, $.75.
It's the ultimate in slacker DIY! It looks like something awesomely handmade, but isn't. Also, it's only part of the necklace. If you want to wear that thing as a necklace, you gotta DIY. They also sell a ribbon. Which was also on sale. Which I bought and used.
I did however do a little hacking. One of the buttons is vaguely flower shaped and pink. I changed it out for one in a green color!
Ta Da!


Thursday, May 21, 2015

Belt buckle transplants and a really awesome dress

I really like belts and currently own several tons of them. In fact, one of my nifty little belt/scarf closet hangers just broke from the weight. When it comes to this particular item, I'm mostly talking about the waist-cinching style. Those thick elastic ones that don't hold your pants up, but do help to create an hourglass figure and draw attention to your best feature. Well, my fave feature. So, look at this slightly tacky but necessary for my wardrobe belt:
Ooh, it's a large, blue bird...birds again?! Yeah birds. I got that at Savers awhile back for $2. Anyway the white belt may have worked ok: it didn't look terrible. It was a little dingy, though. No prob, I'll just remove the belt buckle and put it on a more practical belt. Here's one:
There they are, side by side. That black belt had an interesting...texture? It also had a dated knot glued to the belt buckle that I could do without. So, I removed both belt buckles from their elastic belts. Then I gave that black one the bird (te he).
That works!Yea, black with blue bird belt. And then...
I have this green belt with an ugly, 80s, snakeskin looking, double circle buckle. Another transplant. I easily separated those round things from the belt. Now, to find a better buckle.
I just happened to have a spare one; the outdated knot piece that I removed from that black belt. Luckily, the fabric knot was held on with glue, which I ripped right off. This left the hook hardware that I needed. Unfortunately, it didn't match so well with the other end which it would hook into. Easy solution: glue something on it. I have many buttons. I would glue a button on.
As you see, it's a brown buckle and not black and I like black. I think that button was just the best flat and fitting one, and rather than being picky about color, I fired up the glue gun. Wait. I got more.
Look at that cool fancy, old-timey buckle. And yes, all of these "before" pics were taken at night, so they look bad. I don't care much for the quality of the "before" shots. I find that buckle quite striking and I love how it attaches together at the center. The belt itself is kinda lame. It's like a regular elastic piece covered in some saggy, scrunched up casing.
I could either amputate the whole piece from the fancy buckle or rip it open, exposing the unseen elastic underneath.
Or I could do that. I just stretched the aqua material. I removed one side of the buckle and pulled the casing part until it was tight around the elastic part. I cut off the excess, sewed the raw edge and then resewed the buckle back on. That was one easy refashion.
Want to see these pieces at work? I'm not really asking, my vain self already got some outfit pics. I will now take the opportunity to show off an incredible thrift store dress find.
Look at that. Do you know what that is? Well, it's a 40s inspired, black and white, polka dot dress from the clothing label called Stop Staring. It fits perfectly! No alterations needed. I just Googled image searched and didn't see any pics of my dress. It's a really cool label featuring beautiful clothing that costs an arm and an ass. ( I wanted to make it an alliteration.) Really; click the link and get a look at them highfalutin' rich folk prices. Or look at me!
Thrift purists may scoff at the standard $6 price for dresses, but as I twirl around in this, I'm reminded that you can sometimes find something well worth 5 bucks and some change (with the Goodwill discount card.)
Here's the green belt:
I turned the floor standing fan on, as it was a warm afternoon. Got a little windblown effect going. The fancy buckle aqua belt didn't match polka dot dress. So I threw on something from my closet.
Oh, this old thing? I just pull this disco dress out, slap on some makeup, and pose in front of a fan with it. Then I hang it back up.
Thanks for looking and not leaving snarky comments!

Friday, January 23, 2015

The Button Print Shirt-Dress!

Mostly just the "after" pics because zzz... I had this lovely Liz Claiborne dress:
I loved this dress from the moment I laid eyes on it. I knew it was worth the 5 bucks. It looked easy to work with and it had a button print.! I blogged about it last June, so I'll save myself the trouble of writing about it again.
In fact, I'll spare you my process as well. Here's pretty much what I did:
In that post I linked up there, I mentioned how fitting this dress seemed to be despite its larger size. It didn't have the long bodice like all my other 70s/80s dresses. I think I know why:
HA! That's a close up of the picture I took while working on it at night time. See anything? Of course not. What this picture meant to say is; the seam does not look uniform. It's as if it's been cut and re-sewn. Somebody got to this before me and did me a solid by fixing some length! Of course the shoulder area was big, so I folded it over like so:
I did cinch the waist by using the technique of wrapping those straps (seen in the before picture) around my back and then tying in front. But, I couldn't waste the opportunity to use my new belt, one of the cutest ever made. Behold:
 
Button belt! It's one of those waist cinching elastic belts I'm into and the clasp is a giant button! Let's see this shirt dress! And if the hem looks odd, that's because this slippery fabric was hard to fold.
Even with the picture size blown up, it's hard to appreciate the print. Here:
Look at the little white and red buttons! That's what they look like!
Once again:
I actually wore this once and realized it was still too big and had to take in the sides some more. As always, it's not a revolutionary refash. I love it, though.